
 5秒后页面跳转

| 型号 | 品牌 | 获取价格 | 描述 | 数据表 |
| 91911-31109LF | AMPHENOL |
获取价格 |
Board Stacking Connector, 9 Contact(s), 2 Row(s), Male, Straight, 0.039 inch Pitch, Surfac |

|
| 91911-31111 | AMPHENOL |
获取价格 |
Board Stacking Connector, 11 Contact(s), 2 Row(s), Male, Straight, 0.039 inch Pitch, Surfa |
|
| 91911-31111LF | AMPHENOL |
获取价格 |
Board Stacking Connector, 11 Contact(s), 2 Row(s), Male, Straight, 0.039 inch Pitch, Surfa |
|
| 91911-31115LF | AMPHENOL |
获取价格 |
Board Stacking Connector, 15 Contact(s), 2 Row(s), Male, Straight, 0.039 inch Pitch, Surfa |
|
| 91911-31121 | AMPHENOL |
获取价格 |
Board Stacking Connector, 21 Contact(s), 2 Row(s), Male, Straight, 0.039 inch Pitch, Surfa |
|
| 91911-31121LF | AMPHENOL |
获取价格 |
Board Stacking Connector, 21 Contact(s), 2 Row(s), Male, Straight, 0.039 inch Pitch, Surfa |
|
| 91911-31125 | AMPHENOL |
获取价格 |
Board Stacking Connector, 25 Contact(s), 2 Row(s), Male, Straight, 0.039 inch Pitch, Surfa |
|
| 91911-31125LF | AMPHENOL |
获取价格 |
Board Stacking Connector, 25 Contact(s), 2 Row(s), Male, Straight, 0.039 inch Pitch, Surfa |
|
| 91911-31131LF | AMPHENOL |
获取价格 |
Board Stacking Connector, 31 Contact(s), 2 Row(s), Male, Straight, 0.039 inch Pitch, Surfa |
|
| 91911-31169 | AMPHENOL |
获取价格 |
Board Stacking Connector, 69 Contact(s), 2 Row(s), Male, Straight, 0.039 inch Pitch, Surfa |
|
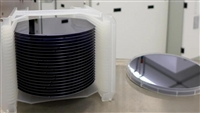
 意法半导体发布第四代SiC技术,助力电动汽车电驱

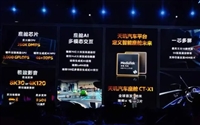 联发科推出全球首款3纳米汽车芯片CT-X1,挑战高通SA8295
 国家大基金减持三家半导体企业,市场反应各异
 晶圆厂易主:Coherent公司2000万英镑出售苹果供应链关键资产
工作时间:9:00-21:00
CEO邮箱:ceo@jiepei.com
投诉邮箱:tousu@jiepei.com


 浙公网安备 33010502006866号 浙ICP备10014259号-119
营业执照ICP证
浙公网安备 33010502006866号 浙ICP备10014259号-119
营业执照ICP证


