
 5秒后页面跳转

| 是否无铅: | 不含铅 | 是否Rohs认证: | 符合 |
| 生命周期: | Obsolete | 包装说明: | , 0603 |
| Reach Compliance Code: | compliant | ECCN代码: | EAR99 |
| HTS代码: | 8532.24.00.20 | 风险等级: | 7.89 |
| 电容: | 7.5e-7 µF | 电容器类型: | CERAMIC CAPACITOR |
| 介电材料: | CERAMIC | 高度: | 0.8 mm |
| JESD-609代码: | e3 | 长度: | 1.6 mm |
| 安装特点: | SURFACE MOUNT | 多层: | Yes |
| 负容差: | 33.33% | 端子数量: | 2 |
| 最高工作温度: | 125 °C | 最低工作温度: | -55 °C |
| 封装形状: | RECTANGULAR PACKAGE | 封装形式: | SMT |
| 包装方法: | TR, PAPER, 7 INCH | 正容差: | 33.33% |
| 额定(直流)电压(URdc): | 100 V | 尺寸代码: | 0603 |
| 表面贴装: | YES | 温度特性代码: | C0G |
| 温度系数: | -/+30ppm/Cel ppm/ °C | 端子面层: | Tin (Sn) - with Nickel (Ni) barrier |
| 端子形状: | WRAPAROUND | 宽度: | 0.8 mm |
| Base Number Matches: | 1 |
| 型号 | 品牌 | 描述 | 获取价格 | 数据表 |
| GQM219 | MURATA | CAPACITOR, CERAMIC, 50; 100V, SURFACE MOUNT, 0805, CHIP |
获取价格 |

|
| GQM2192C2A161GB12D | MURATA | Ceramic Capacitor, Multilayer, Ceramic, 100V, 2% +Tol, 2% -Tol, CH, 60ppm/Cel TC, 0.00016u |
获取价格 |
|
| GQM2192C2A181GB12D | MURATA | Ceramic Capacitor, Multilayer, Ceramic, 100V, 2% +Tol, 2% -Tol, CH, 60ppm/Cel TC, 0.00018u |
获取价格 |
|
| GQM2195C1H101GB01 | MURATA | RF HIGH FREQUENCY CHIP MONOLITHIC CERAMIC CAPACITOR |
获取价格 |
|
| GQM2195C1H330GB01 | MURATA | RF HIGH FREQUENCY CHIP MONOLITHIC CERAMIC CAPACITOR |
获取价格 |
|
| GQM2195C1H820JB01D | MURATA | Ceramic Capacitor, Multilayer, Ceramic, 50V, 5% +Tol, 5% -Tol, C0G, 30ppm/Cel TC, 0.000082 |
获取价格 |
|
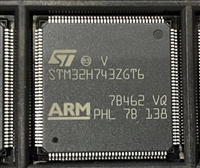 STM32H743技术深度剖析与应用案例探索

 LM321中文资料解析:引脚功能介绍、技术特点、技术特性分析
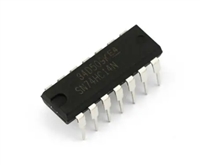 74HC14芯片资料介绍:性能特性分析、引脚介绍
 LM1875芯片手册:功放参数分析、引脚说明、电路设计要点
工作时间:9:00-21:00
CEO邮箱:ceo@jiepei.com
投诉邮箱:tousu@jiepei.com


 浙公网安备 33010502006866号 浙ICP备10014259号-119
营业执照ICP证
浙公网安备 33010502006866号 浙ICP备10014259号-119
营业执照ICP证


