ø30
ø30
ø30 Series Instructions
Safety Precautions
•ꢀTurn off the power to the ø30 series switches & pilot lights
before starting installation, removal, wiring, maintenance,
and inspection of the products. Failure to turn power off
may cause electrical shocks or fire hazard.
•ꢀFor wiring, use wires of a proper size to meet the volt-
age and current requirements. Tighten the M3.5 terminal
screws to a tightening torque of 1.0 to 1.3 N·m. Failure to
tighten terminal screws may cause overheat and fire.
•ꢀTo avoid a burn on your hand, use the lamp holder tool
when replacing lamps.
Instructions
Panel Mounting for Square Pushbuttons
and Pilot Lights
Panel Thickness and Rubber Washer
Adjust the thickness of the rubber washers according
to the panel thickness. Also, make sure to include the
nameplate thickness when using a nameplate.
1. Tighten the square ring to the operator and position the
ring correctly.
2. Lightly tighten the screw to secure the pilot light onto the
panel.
Applicable Models
•ꢀExtendedꢀPushbuttonsꢀwithꢀHalfꢀ
Shroud
Applicable Models
•ꢀExtendedꢀIlluminatedꢀPushbuttonsꢀ
withꢀHalfꢀShroudꢀ(LED)
•ꢀExtendedꢀIlluminatedꢀPushbuttonsꢀ
withꢀHalfꢀShroudꢀ(Incandescent)ꢀ
•ꢀExtendedꢀPushbuttonsꢀwithꢀHalfꢀ
Shroudꢀ(Diecast)
•ꢀExtendedꢀIlluminatedꢀPushbuttonsꢀ
withꢀHalfꢀShroudꢀ(Diecast)ꢀ
Panel
Thickness
(mm)
Supplied
0.8
Rubber Washer
Recommended tightening
torque: 0.15 N·m
1.5mm
3.0mm
Rubber Washer
1.5mm 3.0mm
1 piece 1 piece
Panel
Thickness (mm)
1 piece
1 piece
–
1 piece
1 piece
1 piece
–
Supplied
0.8 to 1.8
1.8 to 3.5
Tightening Torque for Terminal Screws
0.8 to 2.3
2.3 to 4.0
–
1 piece
–
Tighten the terminal screws to a torque of 1.0 to 1.3 N·m.
1 piece
1 piece
Applicable Models
•ꢀExtendedꢀPushbuttonsꢀwithꢀFullꢀ
Shroudꢀ
Applicable Models
Replacement of Lamps
•ꢀExtendedꢀIlluminatedꢀPushbuttonsꢀ
withꢀFullꢀShroudꢀ(Incandescent)
•ꢀExtendedꢀIlluminatedꢀPushbuttonsꢀ
withꢀFullꢀShroudꢀ(LED)
•ꢀExtendedꢀIlluminatedꢀPushbuttonsꢀ
withꢀFullꢀShroudꢀ(Diecast)ꢀ
•ꢀMushroomꢀPushbuttonsꢀwithꢀFullꢀ
Shroudꢀ
Lamps can be replaced by using the lamp holder tool (OR-
55) from the front of the panel.
Panel
Thickness
(mm)
Rubber Washer
1.5mm 3.0mm
How to Remove
To remove, slip the lamp holder tool onto the lamp head
lightly. Then push slightly, and turn the lamp holder tool
counterclockwise.
Supplied
0.8 to 1.5
1.5 to 3.0
3.0 to 4.5
4.5 to 6.0
6.0 to 7.5
3 pieces 1 piece
3 pieces 1 piece
2 pieces 1 piece
Rubber Washer
1.5mm 3.0mm
2 pieces 1 piece
1 piece 1 piece
1 piece 1 piece
Panel Thickness
(mm)
How to Install
1 piece
–
1 piece
1 piece
–
To install, insert the lamp head into the lamp holder tool.
Place the pins on the lamp base to the grooves in the
lamp socket. Inset the lamp and turn it clockwise.
Supplied
0.8 to 2.0
2.0 to 3.5
3.5 to 5.0
1 piece
Applicable Models
–
1 piece
–
•ꢀExtendedꢀPushbuttonsꢀwithꢀFullꢀ
Shroudꢀ(Diecast)
ꢀ
5.0 to 6.0 (6.5) 1 piece
Panel
Thickness
(mm)
Rubber Washer
1.5mm 3.0mm
2 pieces 1 piece
The number in brackets is for mush-
room pushbuttons with full shroud.
Extended illuminated pushbuttons
with full shroud (incandescent) are
5.0 mm maximum.
Supplied
0.8 to 2.5 2 pieces 1 piece
2.5 to 4.0 1 pieces 1 piece
OR-55
Applicable Models
•ꢀToggleꢀLever
•ꢀKnobꢀPushꢀTurnꢀLockꢀIlluminatedꢀ
Pushbuttons
4.0 to 5.5
–
1 piece
–
5.5 to 6.0 1 piece
Installing the Anti-rotation Ring
Applicable Models
•ꢀOtherꢀModelsꢀ(ExcludingꢀSquare)
Rubber Washer
1.5mm 3.0mm
1 piece 1 piece
1 piece 1 piece
Panel Thickness
(mm)
ꢀ
Anti-rotation rings are used
on selector switches or
pushbuttons which rotate
and used when using no
nameplates.
Insert a 1.5mm thick rubber
washer between the panel
and the anti-rotation ring as
shown on the right.
Panel
OGL11
Panel
Thickness
(mm)
Rubber Washer
1.5mm 3.0mm
Supplied
0.8 to 2.0
2.0 to 3.5
–
1 piece
–
Supplied
0.8 to 3.5
3.5 to 5.0
5.0 to 6.5
6.5 to 7.5
2 pieces 1 piece
2 pieces 1 piece
3.5 to 5.5 (5.0)
1 piece
The number in brackets is for knob
push turn lock illuminated pushbut-
tons.
1 piece
–
1 piece
1 piece
–
1 piece
Rubber Washer
(14/03/18)
77

 5秒后页面跳转


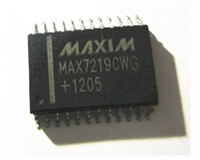 MAX7219驱动8段数码管详解及数据手册关键信息

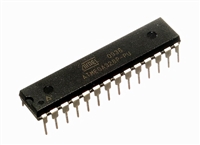 ATMEGA328P技术资料深入分析
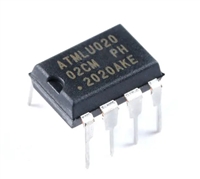 AT24C02芯片手册管脚信息、参数分析、应用领域详解
 AT24C256芯片手册参数分析、引脚说明、读写程序示例


 浙公网安备 33010502006866号 浙ICP备10014259号-119
营业执照ICP证
浙公网安备 33010502006866号 浙ICP备10014259号-119
营业执照ICP证


