408-9973
5. Insert stripped wire into contact insulation and
wire barrels until it is butted against the wire stop, as
shown in Figure 3.
the tool must be adjusted. Refer to Section 7,
RATCHET (Crimp Height) ADJUSTMENT.
7. RATCHET (Crimp Height) ADJUSTMENT
6. Holding the wire in place, squeeze tool handles
together until ratchet releases. Allow tool handles to
open and remove crimped contact.
1. Remove the lockscrew from the ratchet
adjustment wheel.
The crimped contact may stick in the crimping area,
but the contact can be easily removed by pushing
2. With a screwdriver, adjust the ratchet wheel from
the locator side of the tool (see Figure 5).
NOTE
downward on the top of the locator (see Figure 3).
i
Screwdriver
7. Check the contact's crimp height as described in
Section 6, Crimp Height Inspection. If necessary,
adjust the crimp height as described in Section 7,
RATCHET (Crimp Height) ADJUSTMENT.
6. CRIMP HEIGHT INSPECTION
RATCHET (Crimp Height) inspection is performed
through the use of a micrometer with a modified anvil,
commonly referred to as a crimp-height comparator.
TE does not manufacture or market crimp-height
comparators. Detailed information on obtaining and
using crimp-height comparators can be found in
instruction sheet 408-7424.
Ratchet
Adjustment
Wheel
Proceed as follows:
Lockscrew
(Typ)
1. Refer to Figure 4 and select a wire (maximum
size) for each crimp section listed.
Figure 5
3. Observe the ratchet adjustment wheel. If a tighter
crimp is required, rotate the adjustment wheel
COUNTERCLOCKWISE to a higher-numbered
setting. If a looser crimp is required, rotate the
adjustment wheel CLOCKWISE to a lower-
numbered setting.
Position Point
on Center of
Wire Barrel
Opposite
Seam
4. Replace the lockscrew.
Modified
“A”
5. Make a sample crimp and measure the crimp
height. If the dimension is acceptable, replace and
secure the lockscrew. If the dimension is
unacceptable, continue to adjust the ratchet, and
again measure a sample crimp.
Anvil
CRIMP SECTION
(Wire Size
CRIMP HEIGHT
DIMENSION “A” AND
TOLERANCE (±)
WIRE SIZE
AWG (Max)
Marking)
22
24
26-22
26-24
8. MAINTENANCE
.71 ±.05
[.028 ± .002]
Ensure that the tool and dies are clean by wiping them
with a clean, soft cloth. Remove any debris with a
clean, soft brush. Do not use objects that could
damage the tool. When not in use, keep handles
closed to prevent objects from becoming lodged in the
crimping dies, and store in a clean, dry area.
.97 ±.05
[.038 ± .002]
18
20-18
Figure 4
2. Refer to Section 5, CRIMPING PROCEDURE,
and crimp the contact(s) accordingly.
3. Using a crimp height comparator, measure the
wire barrel crimp height as shown in Figure 4. If the
crimp height conforms to that shown in the table,
the tool is considered dimensionally correct. If not,
4 of 6
Rev C

 5秒后页面跳转


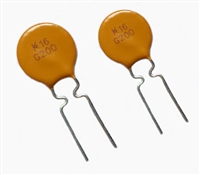 NTC热敏电阻与PTC热敏电阻的应用原理及应用范围

 GTO与普通晶闸管相比为什么可以自关断?为什么普通晶闸管不能呢?从GTO原理、应用范围带你了解原因及推荐型号
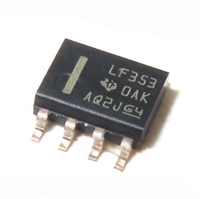 LF353数据手册解读:特性、应用、封装、引脚说明、电气参数及替换型号推荐
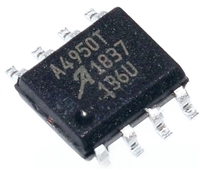 A4950资料手册解读:特性、应用、封装、引脚功能、电气参数及代换型号


 浙公网安备 33010502006866号 浙ICP备10014259号-119
营业执照ICP证
浙公网安备 33010502006866号 浙ICP备10014259号-119
营业执照ICP证


