
 5秒后页面跳转

| 是否Rohs认证: | 符合 | 生命周期: | Obsolete |
| Reach Compliance Code: | compliant | ECCN代码: | EAR99 |
| HTS代码: | 3926.90.99.80 | 风险等级: | 5.27 |
| 光电设备类型: | LED MOUNTING HARDWARE |
| 型号 | 品牌 | 描述 | 获取价格 | 数据表 |
| ADNS-2220-001 | AGILENT | High-performance Optical Mouse Sensor |
获取价格 |

|
| ADN-S-25-10-A-P-A | FESTO | Compact air cylinder |
获取价格 |
|
| ADN-S-25-10-I-P-A-F1A | FESTO | Compact cylinder |
获取价格 |
|
| ADN-S-25-20-A-P | FESTO | Compact cylinder |
获取价格 |
|
| ADN-S-25-20-A-P-A | FESTO | Compact air cylinder |
获取价格 |
|
| ADN-S-25-25-A-P | FESTO | Compact cylinder |
获取价格 |
|
 ?TPA3116D2功放芯片参数详解、引脚说明

 74HC165引脚说明、驱动程序示例解读
 深入解析AD9833:DDS频率合成器的卓越性能与广泛应用
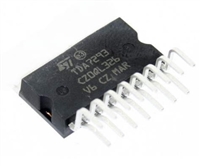 高性能TDA7293音频功率放大器技术特性与应用分析
工作时间:9:00-21:00
CEO邮箱:ceo@jiepei.com
投诉邮箱:tousu@jiepei.com


 浙公网安备 33010502006866号 浙ICP备10014259号-119
营业执照ICP证
浙公网安备 33010502006866号 浙ICP备10014259号-119
营业执照ICP证


