Discontinued as of August 31, 2011
Cautions For Use of the NS Series
Cautions For Use of the NS Series
Cautions For Use
1. Mounting and removing the color
cap and inscribed plate
4. Precautions when connecting
wiring
1) Removing
Terminals should be soldered at 20 W for
less than 5 seconds, or at 260°C for less
than 3 seconds, without applying external
force. When doing this work, make sure
the soldering iron does not come in
contact with the switch itself, and that,
when connecting the wiring, no tensile
force is applied to the terminal. Avoid
bending the terminal or subjecting it to
excessive force. Non-corroding liquid
resin flux should be used.
Grip the grooved part of the color cap
with the removal tool (ACDL1804), and
pull it towards you to remove the
operating parts (the color cap, inscribed
plate and lens holder). The inscribed
plate can be removed by pushing the
color cap outward from the back side,
freeing the grooved section that joins it to
the holder. The plate is inscribed on one
surface, as shown below, and not on the
other side.
5. Caution regarding LED service
voltage
A service voltage of 5 V DC indicates a
Grooved
section
Joining grooves
perfect direct current value.
6. Handling and Usage Precautions
1) Aggregate tight mounting
Inscribed
surface
Please be aware that heat caused by
aggregate tight mounting of indicator
lamps and illuminated pushbutton
switches or continuously lit lamps can
cause the ambient temperature to
exceed the prescribed amount.Measures
must be taken to ventilate or lower the
operation voltage if the mounting panel is
not metal or if the product is being used
in a sealed control panel.
Color cap
Inscribed plate Holder
2) Mounting
Place the inscribed plate in the holder,
line up the grooves in the color cap and
the holder, and press them together.
When doing this, make sure the inscribed
plate is facing the correct direction. After
the inscribed plate and color cap have
been mounted in the holder, insert the
assembled unit in the main unit, making
sure it faces the correct direction.
2. Mounting and removing LEDs
[Removing the LED]
2) Replacement of buttons (illuminating
and non-illuminating)
Do not replace alternate type buttons
(illuminating and non-illuminating) when
they are locked. (Replacing while locked
might damage the internal mechanism.)
You must release the locks before
replacing.
Use a lamp replacement tool to remove
the LED. Do not use pliers.
[Mounting the LED]
Install using a lamp replacement tool. Be
sure that the orientation is correct when
mounting.
3) Storage and place of use
(1) Please use within the working
ambient temperature and humidity
ranges given on the ratings display.
(2) When using in a location where oil,
water and dirt are present, install a dust
cover so that foreign substances cannot
enter the sliding part of the pushbutton.
4) Contact (microswitch)
Mounting side
Removing side
55
When using identical NC (normal close)
and NO (normal open) microswitch
contacts, do not connect to the wrong
voltage or to the wrong type of power
supply. Doing so will cause a dead short.
5) Oil resistance
The product has been evaluated with
commonly used standard machining oil
and cooling oil. Please inquire about
other oils, since use of some special oils
may not be possible.
3. Precautions when mounting the
panel
Use a separately sold ring tightener when
mounting to a panel. The use of needle-
nose pliers or similar and the application
of excessive tightening force can cause
damage to the ring. The recommended
ring tightening torque is 0.88 N·m.
All Rights Reserved © COPYRIGHT Panasonic Electric Works Co., Ltd.


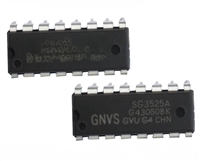
 SG3525资料手册详解:SG3525参数分析、引脚说明、应用介绍

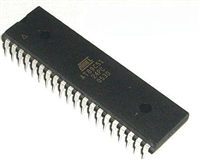
 AT89C51单片机资料手册详细解析及应用示例

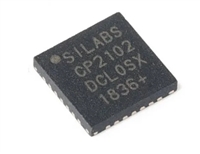
 CP2102资料手册解读:CP2102引脚说明、关键参数分析

 资料手册解读:UC3842参数和管脚说明
