FDS_6533_6534_004
71M6533/G/H and 71M6534/H Data Sheet
Figures
Figure 2: General Topology of a Chopped Amplifier...............................................................................12
Figure 4: AFE Block Diagram.................................................................................................................14
Figure 5: Samples from Multiplexer Cycle..............................................................................................17
Figure 7: Interrupt Structure...................................................................................................................36
Figure 8: Optical Interface......................................................................................................................42
Figure 9: Connecting an External Load to DIO Pins ...............................................................................46
Figure 11: 3-wire Interface. Write Command, HiZ=1..............................................................................49
Figure 12: 3-wire Interface. Read Command.........................................................................................49
Figure 13: 3-Wire Interface. Write Command when CNT=0...................................................................49
Figure 15: SPI Slave Port: Read Operation with Gap .............................................................................51
Figure 16: SPI Slave Port: Typical Read and Write Operations ..............................................................53
Figure 17: Functions Defined by V1.......................................................................................................53
Figure 18: Voltage, Current, Momentary and Accumulated Energy.........................................................55
Figure 19: Timing Relationship between ADC MUX and Compute Engine..............................................56
Figure 20: RTM Output Format..............................................................................................................56
Figure 21: Operation Modes State Diagram ...........................................................................................57
Figure 23: Power-Up Timing with V3P3SYS and VBAT Tied Together ...................................................60
Figure 24: Power-Up Timing with VBAT Only.........................................................................................61
Figure 25: Functional Blocks in BROWNOUT Mode...............................................................................62
Figure 26: Functional Blocks in LCD Mode.............................................................................................63
Figure 28: Wake Up Timing ...................................................................................................................66
Figure 29: MPU/CE Data Flow...............................................................................................................66
Figure 30: MPU/CE Communication ......................................................................................................67
Figure 31: Resistive Voltage Divider ......................................................................................................68
Figure 32: CT with Single Ended (Left) and Differential Input (Right) Connection....................................68
Figure 33: Resistive Shunt (Left), Rogowski Sensor (Right) ...................................................................68
Figure 34: Error Band for VREF over Temperature (Regular-Accuracy Parts) ........................................71
Figure 35: Error Band for VREF over Temperature (High-Accuracy Parts) .............................................71
Figure 36: Connecting LCDs..................................................................................................................73
Figure 37: I2C EEPROM Connection......................................................................................................73
Figure 38: Three-Wire EEPROM Connection.........................................................................................74
Figure 39: Connections for UART0 ........................................................................................................74
Figure 40: Connection for Optical Components......................................................................................75
Figure 41: Voltage Divider for V1...........................................................................................................75
Figure 42: External Components for the RESET Pin: Push-Button (Left), Production Circuit (Right) .......76
Figure 43: External Components for the Emulator Interface ...................................................................76
Figure 45: CE Data Flow: Multiplexer and ADC....................................................................................105
Figure 47: CE Data Flow: Squaring and Summation Stages.................................................................106
Figure 48: SPI Slave Port (MISSION Mode) Timing .............................................................................117
Figure 49: Wh Accuracy (0.1 A - 200 A, 240 V, Room Temperature) at Various Frequencies (Differential
Mode, CTs) ..................................................................................................................................118
Figure 50: Typical Wh Accuracy (0.02 A - 200 A, 240 V, Room Temperature), Various Load Angles
(Differential Mode, CTs)................................................................................................................118
Figure 51: 71M6533/71M6533G/71M6533H 100-Pin LQFP Package Outline.......................................119
Figure 52: 71M6534/6534H 120-Pin LQFP Package Outline................................................................120
Figure 53: Pinout for 71M6533/71M6533G/71M6533H LQFP-100 Package.........................................121
Figure 54: Pinout for 71M6534/71M6534H LQFP-120 Package ...........................................................122
Rev 2
5

 5秒后页面跳转


 SI2301 N沟道MOSFET:资料手册参数分析

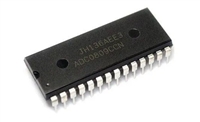 ADC0809逐次逼近寄存器型模数转换器:资料手册参数分析
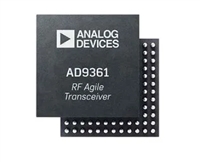 AD9361捷变收发器:全面参数解析与关键特性概览
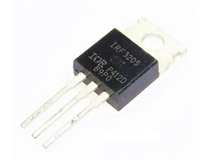 IRF3205功率MOSFET:资料手册参数分析


 浙公网安备 33010502006866号 浙ICP备10014259号-119
营业执照ICP证
浙公网安备 33010502006866号 浙ICP备10014259号-119
营业执照ICP证


