408-4064
.
Screwdriver
Ratchet
Adjustment
Pawl
CRIMP SECTION
(WIRE SIZE
CRIMP HEIGHT
DIM (A) AND
TOLERANCE (±)
WIRE SIZE
AWG (Max)
MARKING)
0.79±0.05
[.031±.002]
22
26-22
Lockscrew
Figure 4
6. CRIMP HEIGHT INSPECTION
Figure 5
Crimp height inspection is performed through the
use of a micrometer with a modified anvil,
commonly referred to as a crimp height comparator.
Tyco Electronics does not market crimp height
comparators. Refer to Instruction Sheet 408-7224
for detailed information on obtaining and using a
crimp height comparator.
8. MAINTENANCE
Ensure that the tool and dies are clean by wiping them
with a clean, soft cloth. Remove any debris with a
clean, soft brush. Do not use objects that could
damage the tool. When not in use, keep handles
closed to prevent objects from becoming lodged in the
crimping dies, and store in a clean, dry area.
Proceed as follows:
9. VISUAL INSPECTION
1. Refer to Figure 4 and select a wire (maximum
size) for the crimp section.
The crimping dies should be inspected on a regular
basis to ensure that they have not become worn or
damaged. Inspect the crimp section for flattened,
chipped, worn, or broken areas. If damage or
abnormal wear is evident, the tool must be replaced.
See Section 10, REPLACEMENT.
2. Refer to Section 4, CRIMPING PROCEDURE,
and crimp the contact(s) accordingly.
3. Using a crimp height comparator, measure the
wire barrel crimp height as shown in Figure 4. If
the crimp height conforms to that shown in the
table, the tool is considered dimensionally
correct. If not, the tool must be adjusted. Refer to
Section 7, CRIMP HEIGHT ADJUSTME
10. REPLACEMENT
Customer-replaceable parts are shown in Figure 1.
Available separately, PRO-CRIMPER III Hand Tool
Repair Kit 679221-1 includes a replacement nut and a
variety of pins, rings, screws, and springs. If the dies
are damaged or worn excessively, they must be
replaced. Order the repair kit and replaceable parts
through your TE representative, or call 1-800-526-
5142, or send a facsimile of your purchase order to 1-
717-986-7605, or write to:
7. .CRIMP HEIGHT ADJUSTMENT (Figure 5)
1. Remove the lockscrew from the ratchet
adjustment wheel.
2. With a screwdriver, adjust the ratchet wheel
from the locator side of the tool.
3. Observe the ratchet adjustment wheel. If a
tighter crimp is required, rotate the adjustment
wheel COUNTERCLOCKWISE to a higher-
numbered setting. If a looser crimp is required,
rotate the adjustment wheel CLOCKWISE to a
lower-numbered setting.
CUSTOMER SERVICE (038-035)
TYCO ELECTRONICS CORPORATION
PO BOX 3608
HARRISBURG PA 17105-3608
11. REVISION SUMMARY
4. Replace the lockscrew.
Since the previous release of this sheet, the following
changes were made:
5. Make a sample crimp and measure the crimp
height. If the dimension is acceptable, replace
and secure the lockscrew. If the dimension is
unacceptable, continue to adjust the ratchet, and
again measure a sample crimp.
• Added new information to bottom of Figure 1 table
and callout in Figure 2
• Changed information on last page
4 of 5
Rev F

 5秒后页面跳转


 STM32F030C6芯片介绍:主要参数分析、引脚配置说明、功耗及封装

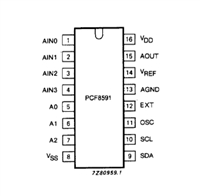 PCF8591数据手册解读:参数、引脚说明
 一文带你了解ss8050参数、引脚配置、应用指南
 深入解析AD7606高性能多通道模数转换器:资料手册参数分析


 浙公网安备 33010502006866号 浙ICP备10014259号-119
营业执照ICP证
浙公网安备 33010502006866号 浙ICP备10014259号-119
营业执照ICP证


