Instruction Sheet
Removal Tools 1804171-1, 1804173-1, and
1804174-1 for Housing of Z-PACK*
Hard Metric (HM)-Zd Right-Angle Headers
408-10055
10 SEP 09 Rev B
Release
Block
If adjusting both pushers, pull the other lever arm,
with the lever attached, from the groove pin.
2. Flip the pusher(s) so that either the
Thumbscrew
Knob
longer--length end (standard position, shown in
Figure 2) or shorter--length end (reversed position)
faces the front of the removal tool. For the
standard position, make sure that the indent of the
pusher faces outward. Refer to Figure 2.
Puller
Pusher
(2 Places)
3. Place the hole of the lever arm onto the groove
pin, and place the dowel pin of the lever arm into
the hole (of the pusher) closest to back of removal
tool. Refer to Figure 2.
Lever Arm
(2 Places)
Lever
If adjusting both pushers, do the same for the other
lever arm (with the lever attached).
REMOVAL TOOL
1804171--1
RIGHT-ANGLE HEADER
2--Pair
3--Pair
4--Pair
4. Secure the lever arm to the lever with the
screws.
1804173--1
1804174--1
Figure 1
Groove
Pin
1. INTRODUCTION
Longer-Length
End of Pusher
The removal tools listed in Figure 1 are designed to
remove the housing from the chicklets of Z--PACK
HM--Zd right--angle headers. The chicklets will remain
on the printed circuit (pc) board.
Dowel
Pin
Reasons for reissue of this instruction sheet are
provided in Section 7, REVISION SUMMARY.
Lever
Arm
Front of
Removal Tool
2. DESCRIPTION
Indent
Screws
Each removal tool consists of the components shown
in Figure 1. After the release block is attached to the
front of the header, the thumbscrew knob is used to
secure the puller to the housing. Rotating the lever
moves the pushers against the pc board and pulls the
housing from the header.
Shorter-Length
End of Pusher
Hole
HEADER
LOCATION
LEFT PUSHER
POSITION
RIGHT PUSHER
POSITION
3. ADJUSTMENT
Single
Standard
Reversed
Standard
Reversed
Standard
Standard
Reversed
Reversed
Before using the removal tool, each pusher must be
positioned according to the location of the header on
the pc board. Refer to Figure 2.
Right End of Stack
Left End of Stack
Middle of Stack
To avoid damage to the header or pc board,
make sure that the pushers are properly
positioned before using the removal tool.
CAUTION
Figure 2
!
Adjust the pusher(s) as follows:
4. REMOVAL PROCEDURE
1. Remove the screws that secure the lever arm
(to be adjusted) onto the lever. Pull the lever arm
from the groove pin. See Figure 2.
1. Loosen, but do not remove, the thumbscrew so
that the puller can be positioned at an angle. See
Figure 3, Detail A.
TOOLING ASSISTANCE CENTER 1-800-722-1111
PRODUCT INFORMATION 1-800-522-6752
This controlled document is subject to change.
For latest revision and Regional Customer Service,
visit our website at www.tycoelectronics.com
E2009 Tyco Electronics Corporation, Harrisburg, PA
1 of 2
All International Rights Reserved
TE logo and Tyco Electronics are trademarks.
LOC B
*Trademark. Other products, logos, and company names used are the property of their respective owners.

 5秒后页面跳转


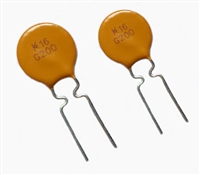 NTC热敏电阻与PTC热敏电阻的应用原理及应用范围

 GTO与普通晶闸管相比为什么可以自关断?为什么普通晶闸管不能呢?从GTO原理、应用范围带你了解原因及推荐型号
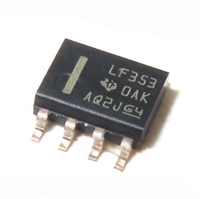 LF353数据手册解读:特性、应用、封装、引脚说明、电气参数及替换型号推荐
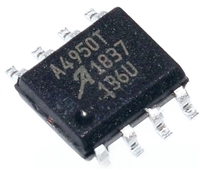 A4950资料手册解读:特性、应用、封装、引脚功能、电气参数及代换型号


 浙公网安备 33010502006866号 浙ICP备10014259号-119
营业执照ICP证
浙公网安备 33010502006866号 浙ICP备10014259号-119
营业执照ICP证


