
 5秒后页面跳转

| 型号 | 品牌 | 描述 | 获取价格 | 数据表 |
| MAX20334 | MAXIM | Overvoltage and Surge-Protected Dual SPDT Data Line Switch |
获取价格 |

|
| MAX20334 | ADI | 具有过压和浪涌保护的双路SPDT数据线路开关 |
获取价格 |
|
| MAX20334EWCT | MAXIM | Overvoltage and Surge-Protected Dual SPDT Data Line Switch |
获取价格 |
|
| MAX20335 | MAXIM | PMIC with Ultra-Low IQ Voltage Regulators and Battery Chargers for Small Lithium Ion Syste |
获取价格 |
|
| MAX20335 | ADI | 小型锂离子系统用带超低IQ电压调节器和电池充电器的PMIC |
获取价格 |
|
| MAX20335AEWX | MAXIM | PMIC with Ultra-Low IQ Voltage Regulators and Battery Chargers for Small Lithium Ion Syste |
获取价格 |
|
 AO3401场效应管参数、引脚图、应用原理图

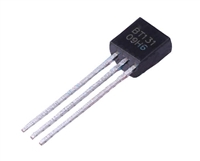 BT131可控硅参数及引脚图、工作原理详解
 74LS32芯片参数、引脚图及功能真值表
 全球首块英伟达H200交付 黄仁勋“送货上门”
工作时间:9:00-21:00
CEO邮箱:ceo@jiepei.com
投诉邮箱:tousu@jiepei.com


 浙公网安备 33010502006866号 浙ICP备10014259号-119
营业执照ICP证
浙公网安备 33010502006866号 浙ICP备10014259号-119
营业执照ICP证


